- Rafter Mounting -
(click pictures for larger view)
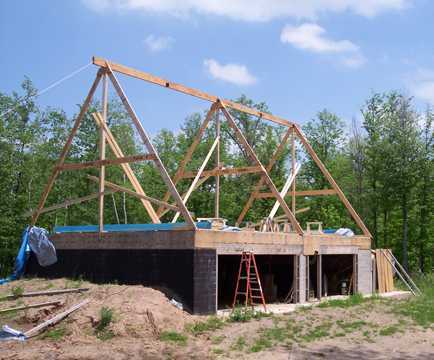
Late May 2006: Here's a picture of the building as it appeared before rafters - and me up on the scaffolding, working on my awesome farmer tan. I'm also nailing rafters up and sporting my indispensible, but cheap and geeky Menards apron. Something you'll notice if you click the "before" picture is that I had previously bolted more 4 more brackets on the ridge beam. They are located between the 3 "A's" (one on front and back of the beam), to bolt up two more "A's" without vertical center supports. The cross beams of these new "A's" will be support for the floor joists that will make the loft bedrooms on either end of the building.
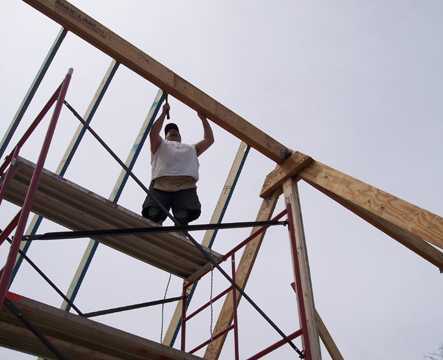
My dad came down from Grand Forks again for a week to help me with the rafter installation - which would have been way too big and dangerous a job for one guy. I rented the 3 sections of scaffolding again, and pulled up the 30' rafters one at a time. We had already nailed on the hanger brackets and oriented them for efficient mounting. My dad held the bottom of the rafter steady while I pulled it up, then helped pick it up to lock the bird's-mouth in place.
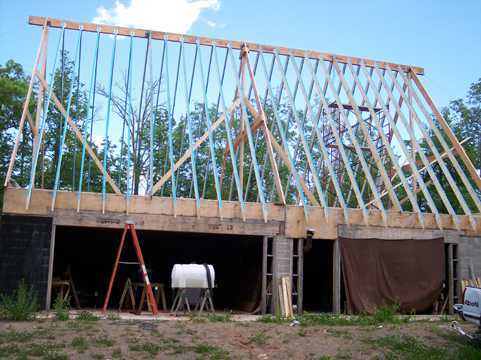
Day one for rafters was a lot of prep (brackets, scaffolding setup, etc.), but we still managed to get 10 rafters mounted. Day two should have moved more quickly, but we ran into a snag. I'm not sure what happenend, but the midpoint "A" legs I cut almost exactly as the original "A" legs, didn't fit. My suspicion is that the main beam 'sagged' a little under the weight of the first 10 rafters. That suspicion was somewhat debunked when we got to the other side of the middle and had the same problem *before* any rafters were mounted. I'm still not sure what the problem was, but we got past it with a little hydraulic jacking and a little "A" trimming on both sides.


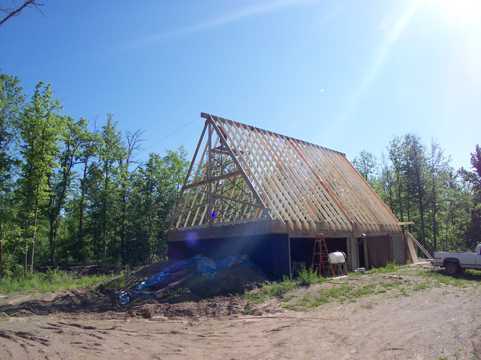
We forgot to take a picture of 'day 3', where we had completed 3/4 of the rafters, but you get the idea anyway. At the end of 'day 4', we were done, but also spent and ready for a couple days of R&R. My mom had driven down to the Mpls metro for a workshop, so my dad went back with her. She was pleased that I had made him drink quarts and quarts of Gatorade, even though he usually wasn't ready for breaks when I 'blew the whistle'. And to think, he was a Teamster at one time! Notice that the ridge beam overhangs the end "A's" a little. That is for the purpose of (4) more rafters to make eaves on both ends of the house. Eventually there will be decking there to hold up the bottom edges of those eave rafters, which will be discussed after another page or two.
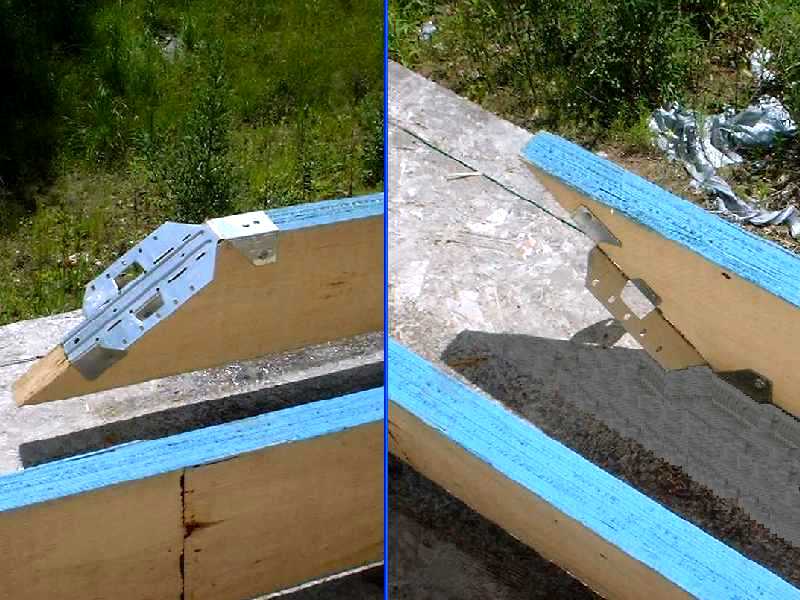
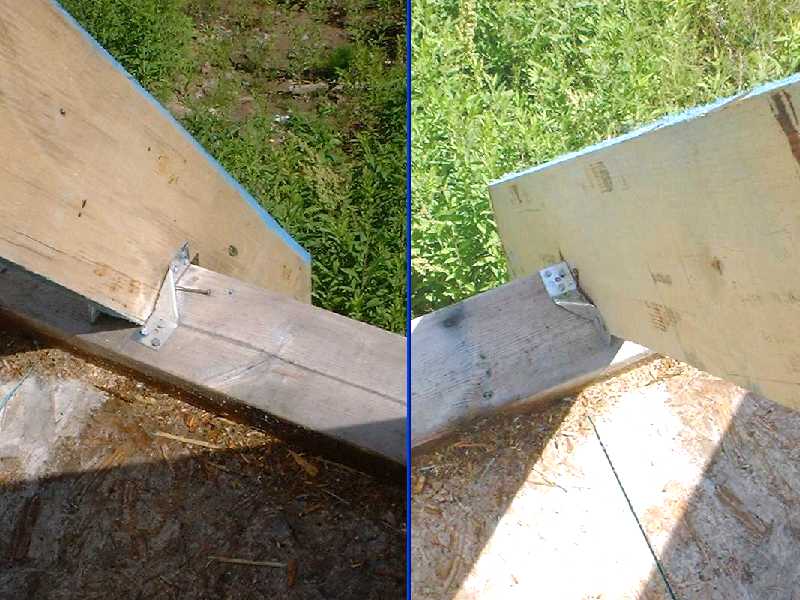
Here are pictures of the rafter hangers (upper) and tie brackets (lower). The hangers are specially designed for steeper roof pitches. I think the ties were designed to be used on one side of the rafter only - or perhaps to secure smaller/lighter rafters. I say that is because they're not "left-hand/right-hand", as you can see from the pictures. Definitely click on the pictures below for a closer look.
Previous Series Series Headings List Next Series
Copyright © 2002- Wright Track Enterprises, Inc. All rights reserved.